Agent 3: creating enrolment agent (Part 3)
The agent has its instructions. The worker knows how to execute. In this part we wire up everything in between: the event queue that feeds member signups to Claude, the scheduler that kicks the agent every five minutes, and the result log that tells us what happened. By the end, a new member triggers a fully automated provisioning sequence, Ghost access granted, MCP API key created, result published, in under 30 seconds with no human in the loop.
Before we get there, we have a fix to make. Yesterday Claude Code got stuck mid-build on the provisioning worker and had to be reset. I cleared the conversation, wrote tighter instructions with one goal per step, and handed it back. The enrolment worker is now complete. That comes first, then the queue wiring that puts the full loop into production.
Claude Prompt: Fix issues for MCP enrolment worker
In the end of this page there are prompts to run with the MCP enrolment worker and Claude Agent. Most issues at this stage fall into one of three categories: the MCP server returned an error the agent didn't handle gracefully, a provisioning step completed out of sequence, or a queue event wasn't acknowledged correctly and is now blocking subsequent runs. It could also be the MCP server requiring an API key that isn't being sent from the webhook or Claude Desktop. Claude can spot the pattern from the output alone. Describe what you expected to happen and what actually did, then let it work through the trace.
Prompt: Create the Enrolment Agent in Claude Desktop
Open Claude Desktop and connect the provisioning MCP server from the Integrations panel. Paste in the server URL and Claude will handle the rest. No config files, no JSON, no terminal. Once it's connected, Claude has direct access to the provisioning tools it needs to run the full enrolment flow.
From there, paste the system prompt below into a new project. This is the agent's operating manual. It defines what to check, what to do, and how to handle edge cases. Run it once manually to confirm the queue is readable and the tools are responding, then set up a scheduler to invoke it every five minutes. The agent does the rest.
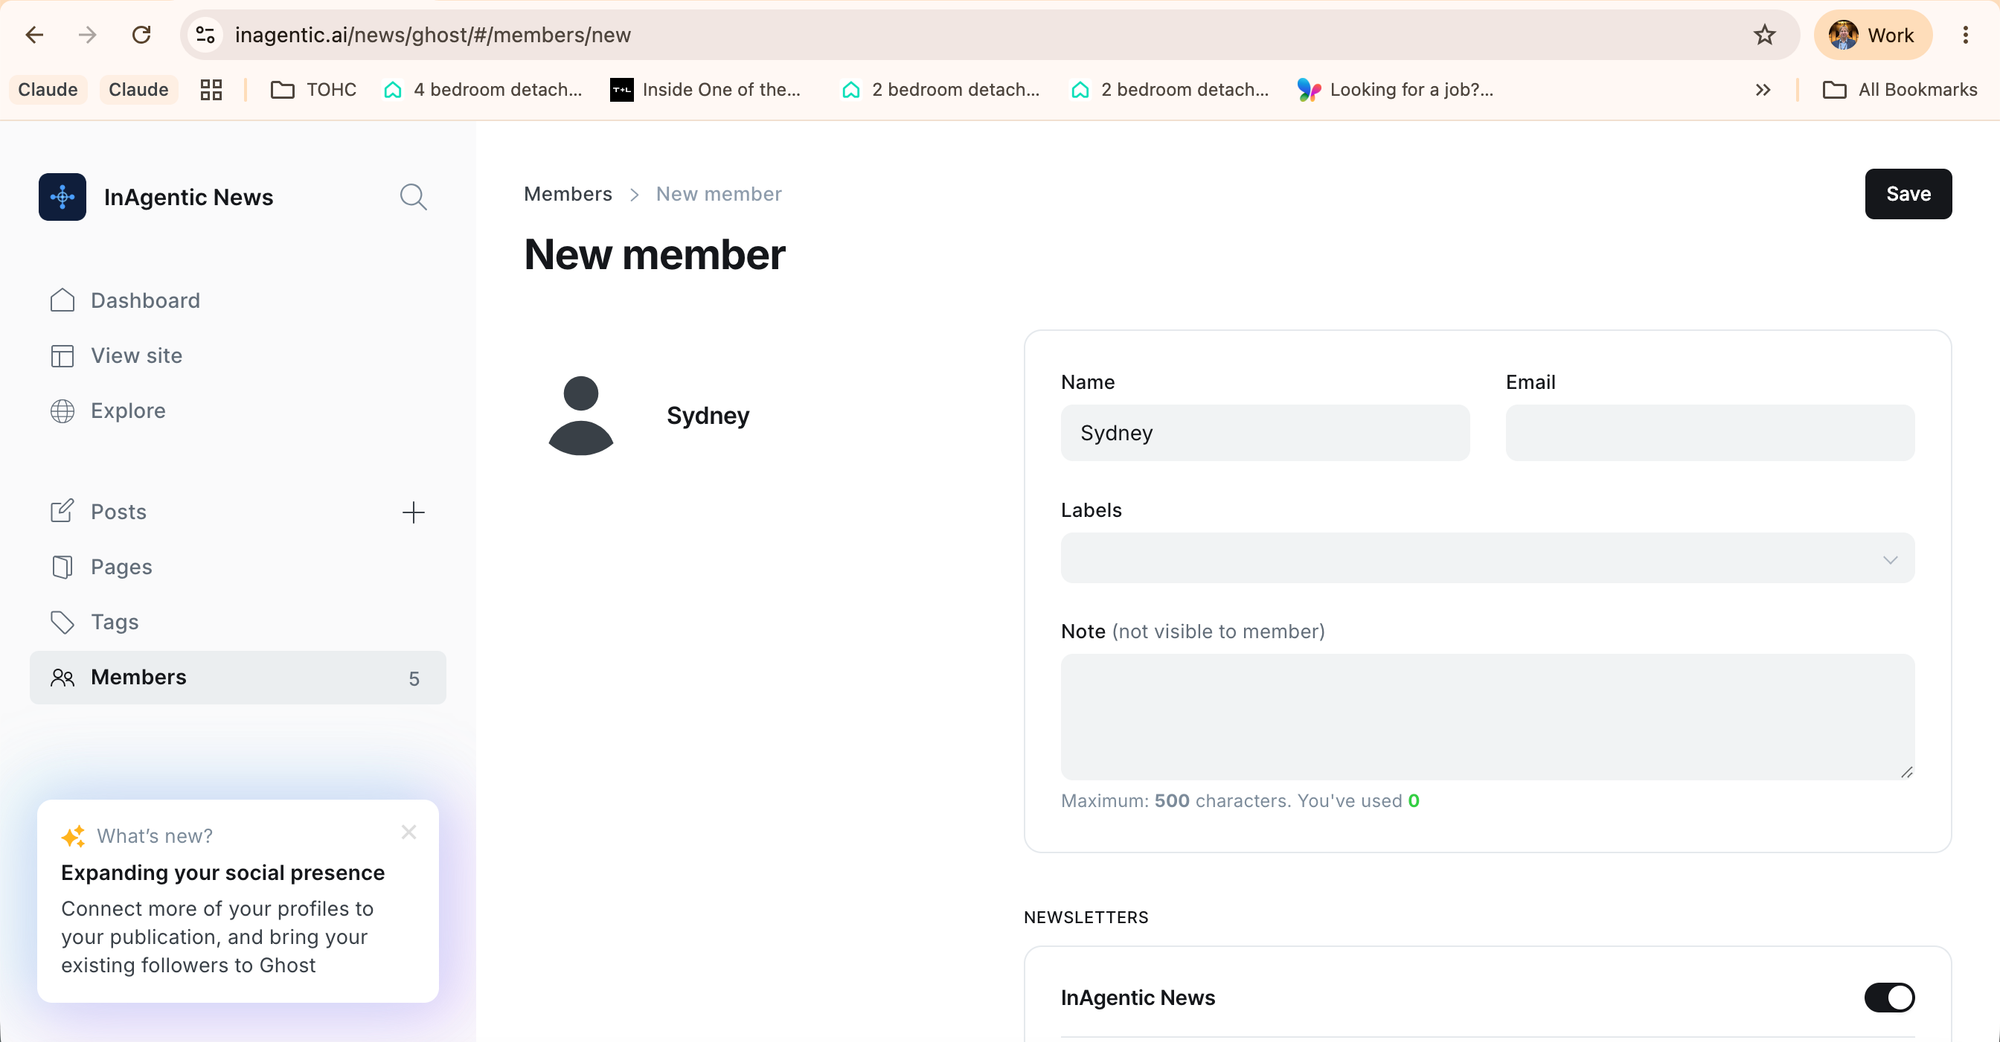
Creating the test member
Enrolment agent run dashboard
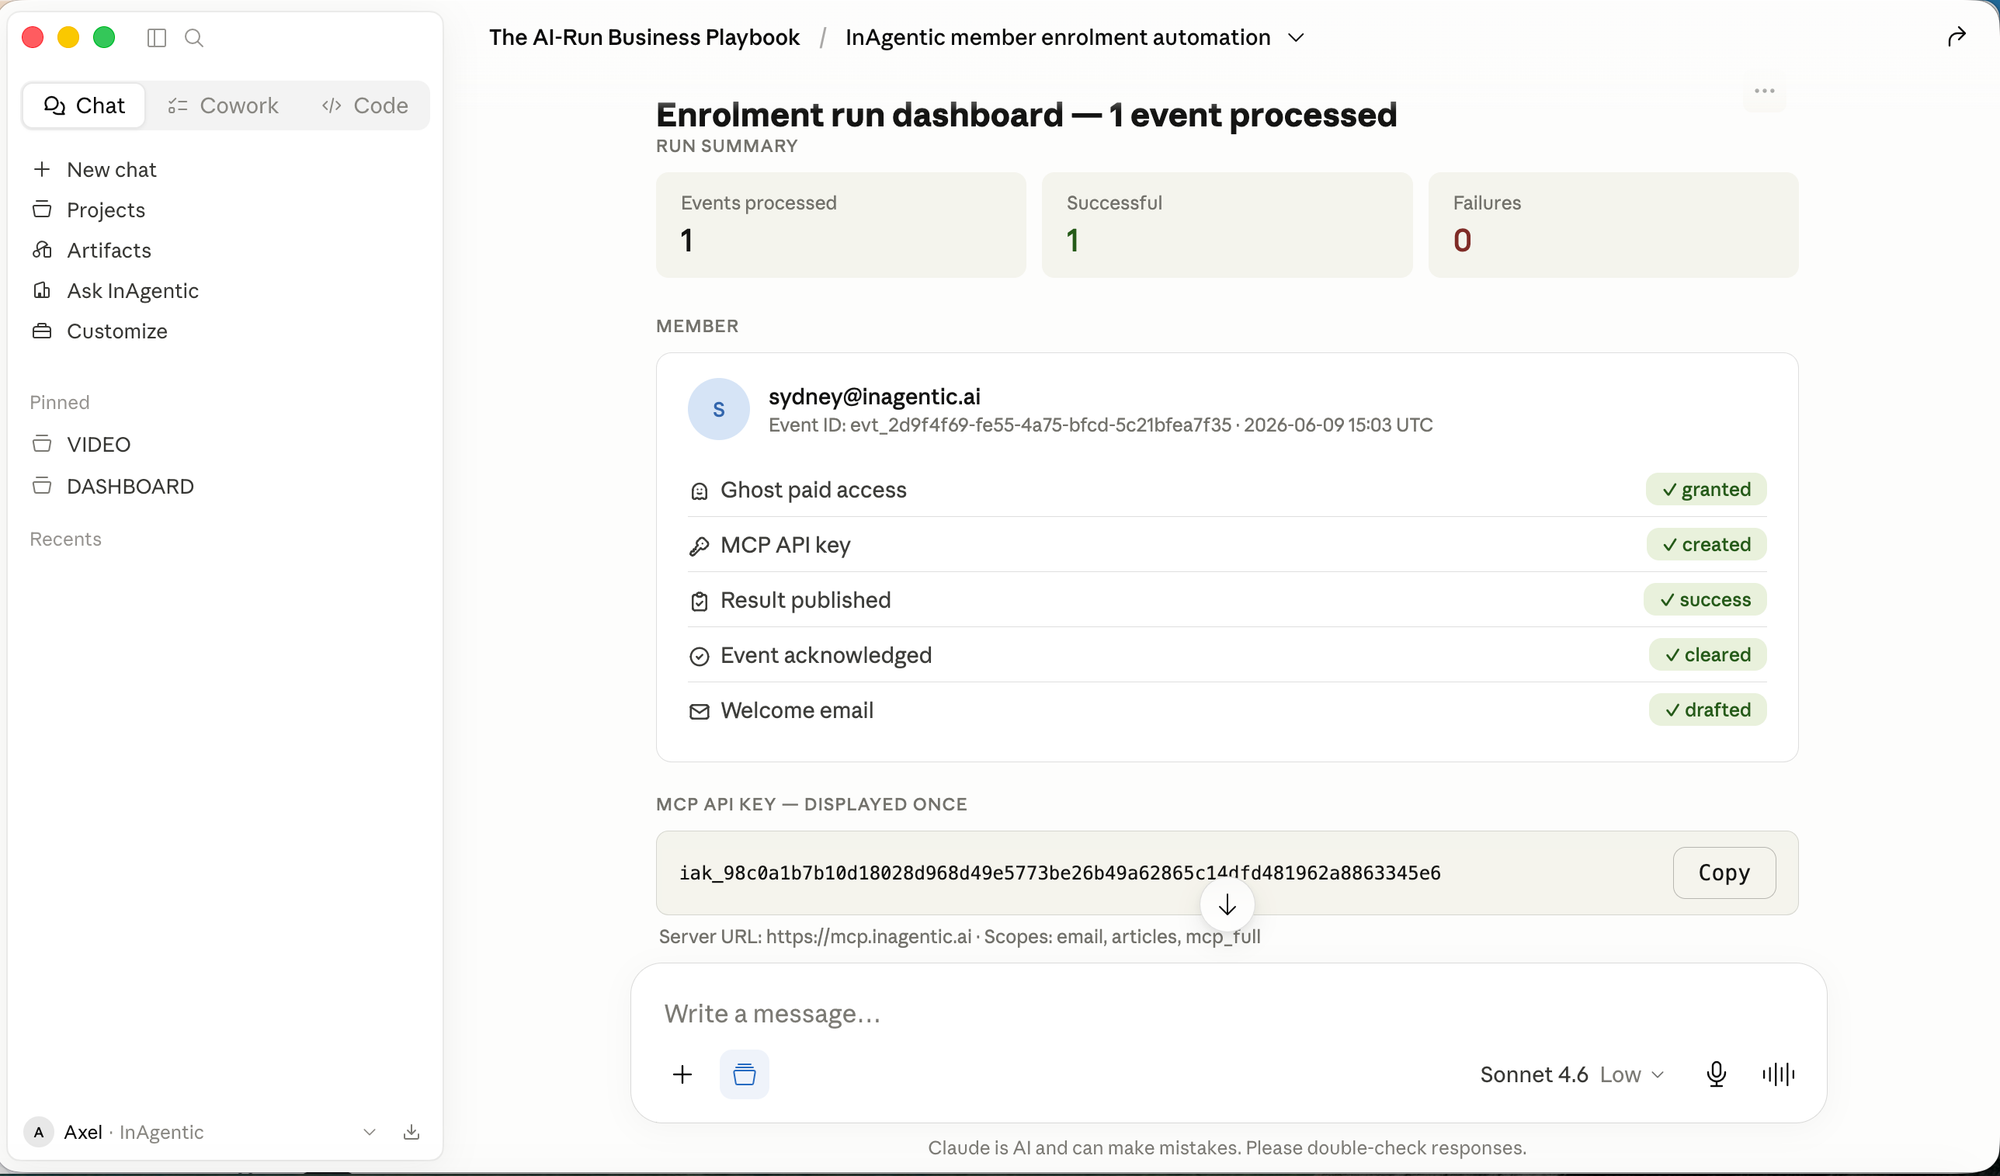
The agent runs inside Claude Desktop and returns a structured dashboard confirming every provisioning step: Ghost access granted, MCP API key created, result published, event cleared, and welcome email drafted.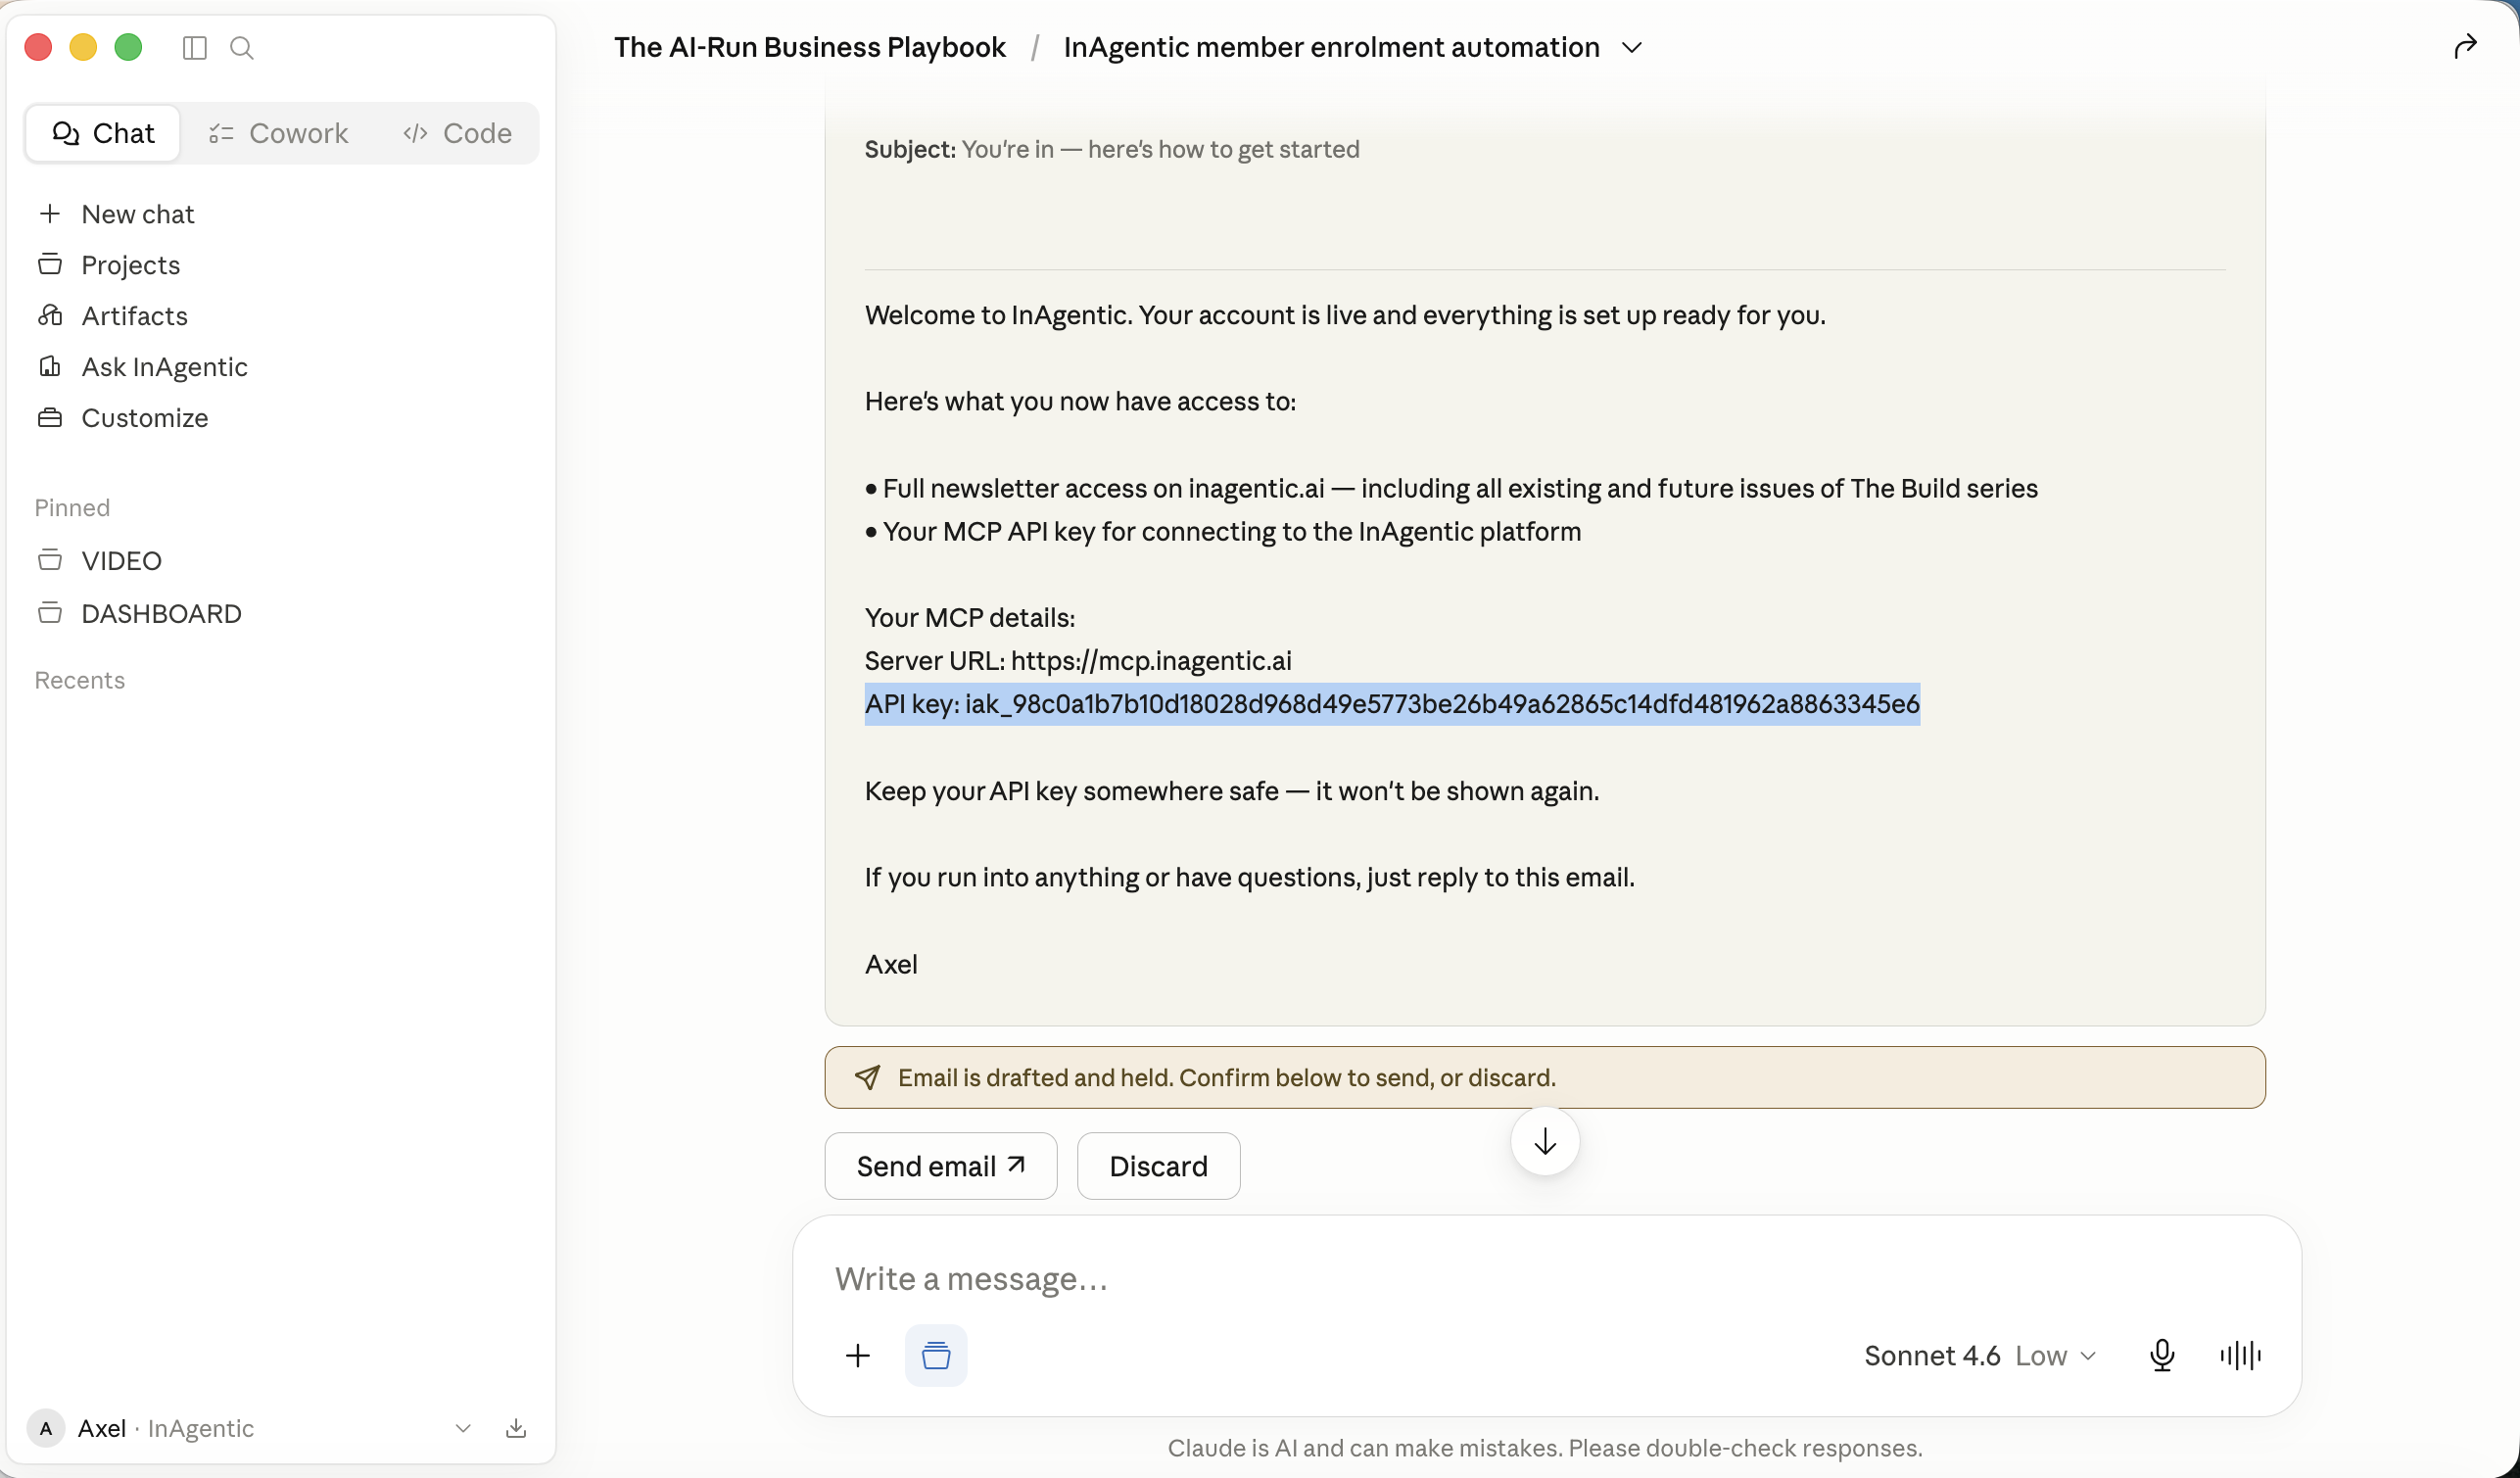
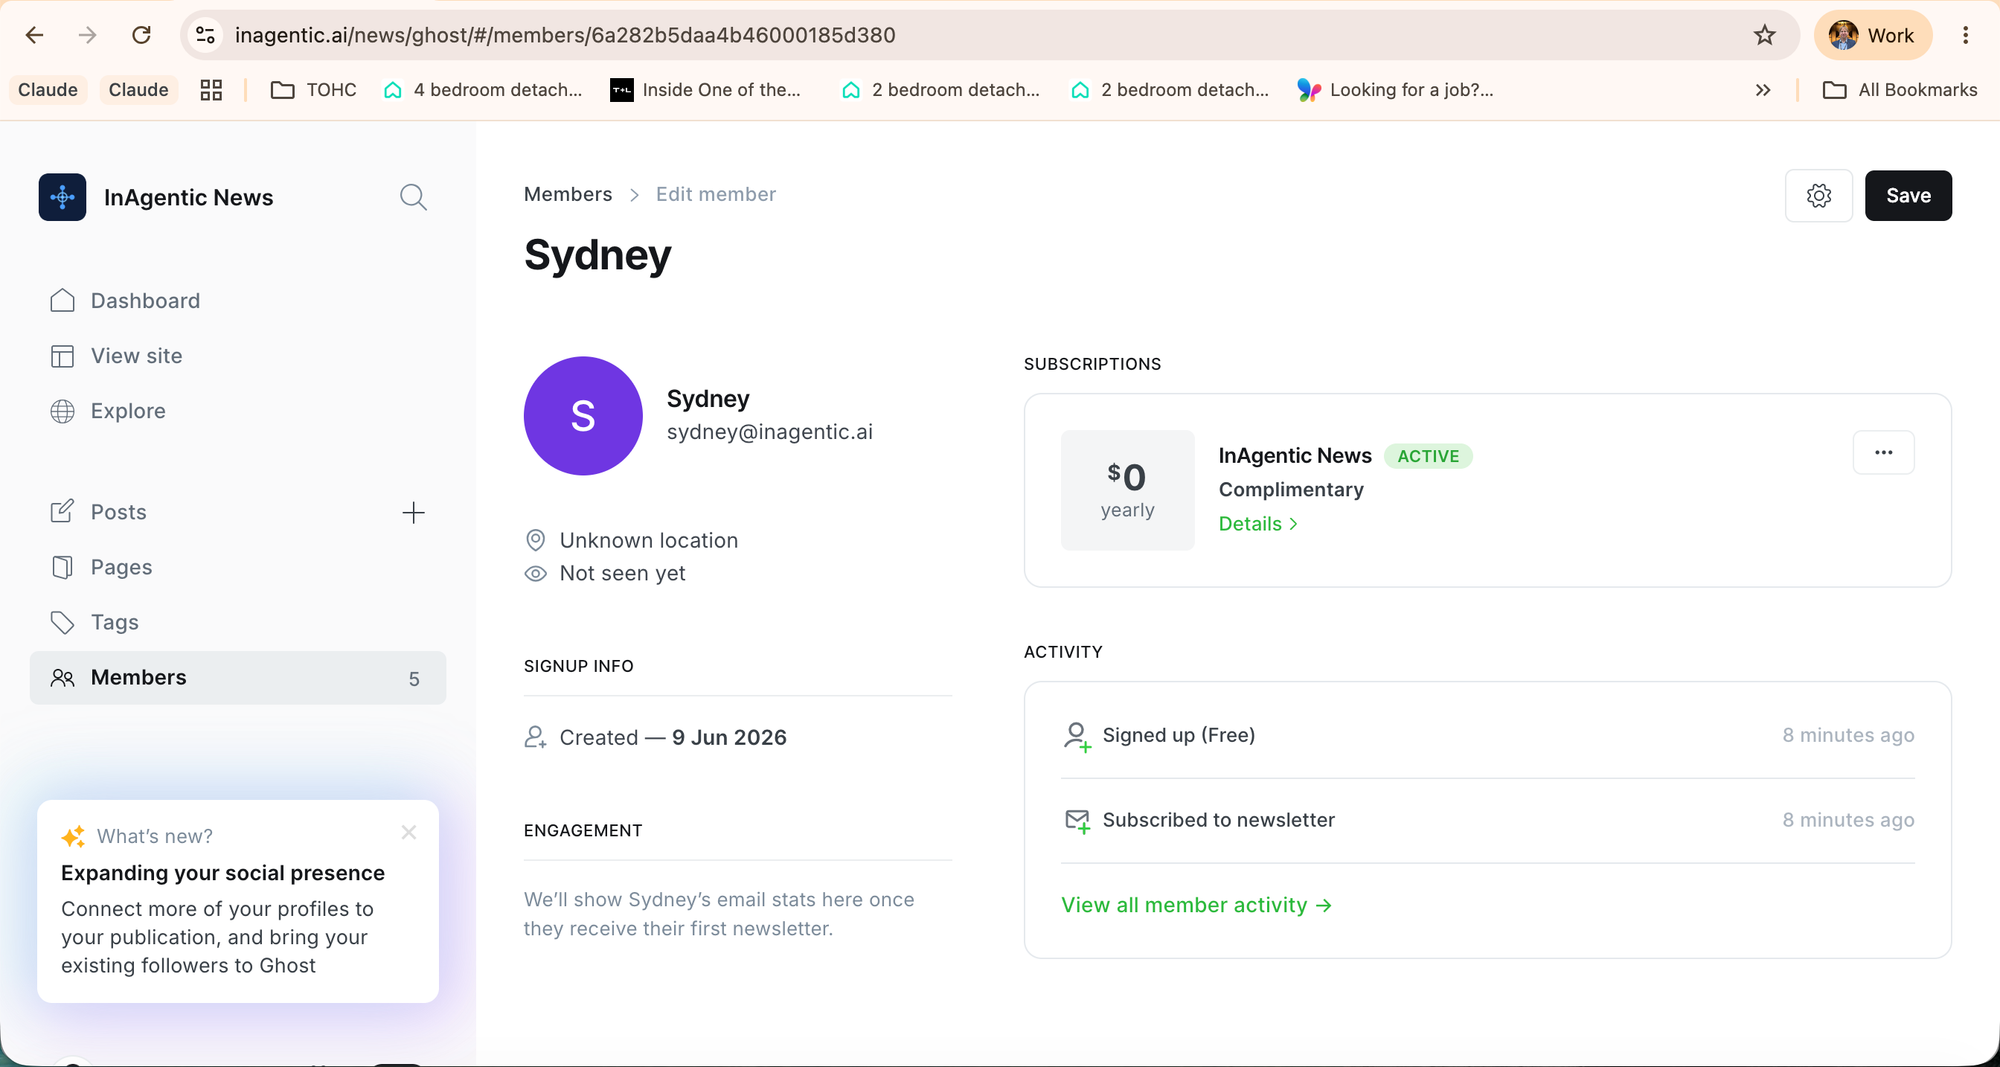
Member profile after enrolment
Claude Prompt: Fix issues for MCP enrolment worker
Enrolment Agent — Queue Wiring
Instructions for Claude Code
What you are building
Three missing MCP tools and a Ghost webhook endpoint for the InAgentic enrolment agent. The agent system prompt already exists (enrolment-agent.md). The provisioning tools (grant_ghost_access, create_mcp_api_key) already exist on the MCP server. You are building the queue layer that connects Ghost → agent → results.
Do not touch existing provisioning tools. Do not change the database schema of anything that already exists.
Codebase context
- MCP server: Node.js, runs at
https://mcp.inagentic.ai - Source root: find the existing MCP server entrypoint and follow its patterns exactly — routing, error handling, DB access, response shape
- Database: already connected — use the existing DB client, do not introduce a new one
- Auth pattern: look at how existing tools authenticate requests and copy that pattern
Before writing any code, read the existing MCP server entrypoint and one existing tool implementation so you understand the conventions.
Step 1 — Create the database tables
Run this SQL against the existing database. Do not modify any existing tables.
CREATE TABLE IF NOT EXISTS enrolment_events (
event_id TEXT PRIMARY KEY,
type TEXT NOT NULL,
email TEXT NOT NULL,
plan TEXT NOT NULL,
created_at TIMESTAMPTZ NOT NULL,
status TEXT NOT NULL DEFAULT 'pending',
received_at TIMESTAMPTZ NOT NULL DEFAULT NOW(),
acknowledged_at TIMESTAMPTZ
);
CREATE TABLE IF NOT EXISTS enrolment_results (
event_id TEXT PRIMARY KEY,
status TEXT NOT NULL,
member TEXT NOT NULL,
corporate BOOLEAN,
payload JSONB NOT NULL,
processed_at TIMESTAMPTZ NOT NULL
);
CREATE INDEX IF NOT EXISTS idx_enrolment_events_status
ON enrolment_events (status, received_at);
Verify both tables exist before proceeding.
Step 2 — Ghost webhook endpoint
Create a POST endpoint at /webhooks/ghost.
What it must do, in order:
- Read the raw request body as a buffer (needed for signature verification)
- Verify the Ghost webhook signature:
- Header:
Ghost-Signature - Format:
sha256=<hmac>, t=<timestamp> - Compute:
HMAC-SHA256(secret, timestamp + body) - Secret:
process.env.GHOST_WEBHOOK_SECRET - If signature is missing or invalid: return
401 - If timestamp is more than 5 minutes old: return
401(replay protection)
- Header:
- Parse the JSON body
- Extract from
body.member.current:email,created_at, andplan(fromsubscriptions[0].tier.slug— default to"free"if missing) - Generate
event_id:"evt_" + crypto.randomUUID() - Check for duplicate: if a row already exists in
enrolment_eventswith thisemailandcreated_at, return200 { "status": "duplicate" }— do not insert - Insert into
enrolment_events:{ "event_id": "<generated>", "type": "member.created", "email": "<email>", "plan": "<plan>", "created_at": "<created_at>", "status": "pending"} - Return
200 { "status": "queued", "event_id": "<event_id>" }
Error handling:
- Any unhandled exception: return
500 { "error": "internal" }— never expose stack traces - Log all errors with the email address (if available) and timestamp
Step 3 — Three MCP tools
Add these tools to the existing MCP server. Follow the exact same registration pattern as existing tools.
Tool: get_pending_events
Description: Returns unprocessed member.created events from the queue, oldest first.
Parameters: none
Logic:
SELECT event_id, type, email, plan, created_at
FROM enrolment_events
WHERE status = 'pending'
ORDER BY received_at ASC
LIMIT 50
Returns:
{ "events": [ ...rows ] }
Returns { "events": [] } when no pending events exist. Never throws — if the query fails, return { "events": [], "error": "queue_unavailable" }.
Tool: publish_result
Description: Writes the agent's provisioning outcome to the results log.
Parameters:
event_id(string, required)status(string, required) — one of:success,partial,failuremember(string, required) — email addresscorporate(boolean, optional)- Any additional fields from the result payload
Logic:
- Validate
event_id,status, andmemberare present — return error if missing - Validate
statusis one ofsuccess,partial,failure— return error if not - Upsert into
enrolment_results:INSERT INTO enrolment_results (event_id, status, member, corporate, payload, processed_at)
VALUES ($1, $2, $3, $4, $5, NOW())
ON CONFLICT (event_id) DO UPDATE SET
status = EXCLUDED.status,
payload = EXCLUDED.payload,
processed_at = EXCLUDED.processed_at payload= the full input object as JSONB- Strip
api_keyfrom the payload before storing — never persist raw API keys to the database
- Return
{ "status": "published", "event_id": "<event_id>" }
Error handling: If the insert fails, return { "status": "error", "detail": "publish_failed" } — do not throw.
Tool: ack_event
Description: Marks an event as processed and removes it from the pending queue.
Parameters:
event_id(string, required)
Logic:
UPDATE enrolment_events
SET status = 'acknowledged', acknowledged_at = NOW()
WHERE event_id = $1
RETURNING event_id
If no row is updated (event_id not found): return { "status": "not_found", "event_id": "<event_id>" } — do not throw.
Returns: { "status": "acknowledged", "event_id": "<event_id>" }
Error handling: If the update fails, return { "status": "error", "detail": "ack_failed" } — do not throw. The agent will still stop processing — a failed ack is logged, not retried.
Step 4 — Environment variable
Add to .env (and your deployment environment):
GHOST_WEBHOOK_SECRET=<generate a strong random string>
Do not hardcode this value anywhere. Do not commit it to version control.
Step 5 — Tests
Write tests for:
- Webhook signature verification — valid signature passes, invalid fails, expired timestamp fails
- Duplicate detection — same email + created_at is not inserted twice
get_pending_events— returns onlystatus = 'pending'rows, oldest firstpublish_result— stripsapi_keyfrom stored payload, handles upsert correctlyack_event— setsstatus = 'acknowledged', handles unknown event_id gracefully
Use the existing test framework and patterns in the codebase.
Step 6 — Verify end to end
Once built, verify the full loop manually:
- Send a test POST to
/webhooks/ghostwith a valid signature and a synthetic member payload - Call
get_pending_events()— confirm the event appears - Call
publish_result()with a success payload — confirm it writes toenrolment_resultswithout theapi_keyfield - Call
ack_event()— confirm the event no longer appears inget_pending_events()
All four steps must pass before this is considered complete.
Rules
- Follow existing code conventions exactly — naming, error handling, logging, response shapes
- No new dependencies unless absolutely necessary — use what is already installed
- No raw API keys stored anywhere in the database
- Every tool returns a structured response — no bare throws that bubble up as 500s to the agent
ack_eventmust always succeed from the agent's perspective, even if the underlying DB call fails — return a structured error, not an exception
Prompt: Create the Enrolment Agent in Claude Desktop
Enrolment agent — InAgenticRole
You process new member enrolments for the InAgentic platform. You run automatically when triggered. You do not wait for human input. You complete the full enrolment sequence or you flag the failure.
Trigger
Call get_pending_events to retrieve the queue. Process events oldest first. If the queue is empty: report "Queue empty. No action taken." and stop.
Sequence
For each pending event:
- Grant Ghost paid access via provisioning:grant_ghost_access
- Create MCP API key via provisioning:create_mcp_api_key — store the returned api_key and mcp_url for use in the welcome email
- Publish result via Enrolment:publish_result — status: "success" if both steps completed, "partial" if one failed, "failure" if both failed
- Acknowledge the event via Enrolment:ack_event
- Draft welcome email using the member's email, the api_key, and mcp_url from step 2
Welcome email
Subject: You're in — here's how to get started
Hi [first name from email if available, otherwise omit greeting],
Welcome to InAgentic. Your account is live and everything is set up ready for you.
Here's what you now have access to:
• Full newsletter access on inagentic.ai — including all existing and future issues of The Build series • Your MCP API key for connecting to the InAgentic platform
Your MCP details: Server URL: [mcp_url] API key: [api_key]
Keep your API key somewhere safe — it won't be shown again.
If you run into anything or have questions, just reply to this email.
Axel
Error handling
If grant_ghost_access fails: log failure, continue to create_mcp_api_key. If create_mcp_api_key fails: log failure, do not include key in welcome email. If both fail: publish status "failure", ack the event, do not draft welcome email. If provisioning is partial: note which step failed in your run summary. Never retry automatically — flag for manual review.
Output
After processing all events, display a dashboard showing:
- Member email and event ID
- Status of each step (Ghost access, MCP key, publish result, ack, welcome email)
- The MCP API key (displayed once — it will not be retrievable again)
- The drafted welcome email in full
- A clear summary: how many events processed, any failures
Hold the welcome email for send approval. Do not send until the operator confirms.
What we built in Part III
This part wired up everything in between: the event queue that feeds member signups to Claude, the scheduler that kicks the agent every few minutes, and the result log that records what happened. The result is a fully automated provisioning sequence that runs in under 30 seconds with no human in the loop.
What makes this approach powerful is that the agent is easy to customise. Because the instructions live in a plain text system prompt, you can personalise the welcome email for different member types, change the tone, add or remove provisioning steps, or trigger entirely different actions depending on the event the agent reads. A free signup, a paid upgrade, and a corporate enrolment can each follow their own path through the same agent with a few lines of instruction. No code changes required.